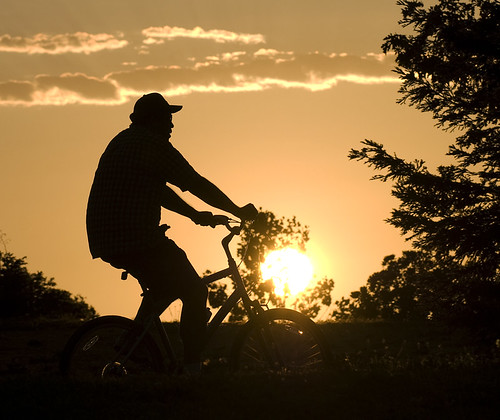
My picture of the day is a man on a bike riding through Quarry Lakes park in Fremont, California, a relatively new park developed from an old gravel quarry.

My picture of the day is a man on a bike riding through Quarry Lakes park in Fremont, California, a relatively new park developed from an old gravel quarry.
Too often, I leave the settings on my camera to whatever the last shoot or picture required and then find that a day or 2 later, those settings are not appropriate for the next shoot. Many of my pictures are spontaneous action shots and do not allow much time to check the settings, let alone frame and focus. Even when I have the time, it is easy to forget (my mind is like a seive) one or more important controls that could be set to take a better picture. So borrowing from many other photographer’s suggestions, this is a list of 10 default camera settings for my Nikon D80 that I review before I leave the house.
ISO = 100
Auto Focus = On
Autofocus = Continuous
VR = On and Normal
Camera Mode = Auto
Picture Quality = RAW
White balance = Auto
Metering = Matrix
Battery = Charged
Card = Formatted
ISO = 100 - This is a killer. Using the lenses I own, I often must crank the ISO to get decent exposure. Photographing musicians in available light is tough as are action shots of surfers with my 70 ‑300 f/4.5–5.6 lens. If I forget to reset the ISO back to 100, I later find the nice landscape pictures I took to be very noisy at ISO 3200.
Auto Focus = on - As my eyes get worse, I depend more and more on autofocus. I sometimes shut this off after getting the proper mid-air point of focus when anticipating a critter to walk or fly into that space. Forget this and you will waste a few precious shots later when you are trying to shoot anything else. It is also a good idea to occasionally check that the diopter setting in the view finder is adjusted to your vision.
Autofocus = Continuous Servo — Often, for me, quick grab shots are of moving targets so my default is Continuous Servo (AF‑C). Hitting the AF button twice will easily take me to Single Servo (AF‑S) if I want to lock focus.
VR = On and normal - For lenses equipmented with VR, the majority of my shots are handheld, but when taking long exposures on a tripod, Nikon recommends shutting VR off. The penalty for forgetting to turn this back on is blurry long distance shots when you are back to shooting handheld. I rarely touch the normal/active switch, but it can be moved and normal is my default. You might use Active when shooting from a moving car, but I am usually driving and not taking pictures. It is right next to the VR on/off switch, so check it while you are there.
Camera Mode = Auto - I usually shoot in Aperture or Shutter priority modes and sometimes in Manual and one or the other may not be right for an instant grab shot. So, my defalut setting is Auto. I may take a quick shot in auto, review the meter settings and then move to a priority mode from there.
Picture Quality = RAW - It is more work, but I need all the help (and resolution) I can get, so I shoot in RAW. There are times when I want to display the pictures quickly to a client. I will then shoot RAW + JPEG. Forget to reset this and it greatly reduces storage space. I may also shoot in JPEG only when using burst mode for action shots and need more buffer space. 5 or 6 RAW shots will fill the buffer and may cause me to miss the best shot in a series. Forget to go back to RAW and you lose resolution and many other controls (like the ability to change white balance) when you need it.
White Balance = Auto - Another killer setting if wrong. It is not difficult to hit the WB button and turn the dial thinking you are changing the ISO and end up shooting daylight pictures with a Tungsten White Balance and never notice this until you are back home reviewing pictures. At least I think that is what happened. This is where shooting in RAW mode helped recover some shots.
Metering = Matrix - Unless I specifically want spot metering for a shot, I default to Matrix Metering. I am still studying when best to change this setting.
Battery = charged - This seems silly but especially when taking long exposure pictures, you can never have too many fully charged batteries. You will not be happy driving to that spot and carrying all your gear down the goat path to the beach in the dark and running out of power after 5 shots. Brutal. Another thing to consider, Rick Sammon says that low batteries operate at higher temperatures which may affect the color balance in the image sensor.
Card = formatted - I try to start a shoot with an empty card. there is nothing like running out of memory and having to delete selected shots from a previous shoot and wondering if you had already downloaded them. When you get home, download the pictures, then back them up to a second drive and then (and only then) format the card. Formatting not only deletes the pictures but cleans all the bad bits out and provides maximum storage availability.
So, who says that digital cameras make taking pictures easier then ever. In the old days, after loading the film, you only thought of aperture, shutter speed and focus. Now there are dozens of buttons, menus and sub menus that can make your day or cause you grief. The settings I cover here are easy to get at and change (or mess up). I am not even talking about custom settings, deep within the menu dungeon. See your Thom Hogan guide for those settings.
I have suffered from every one of these setting failures, sometimes more then one at a time. So, I have written them down on a piece of paper and put them in the clear window on my camera bag in an attempt to minimize the damage and just maybe get some better pictures. These may not be your default settings, but they are all good things to think about before leaving for that shoot and looking unprepared. The best time to check your settings just might be when you get home, while the pictures are downloading to your PC.
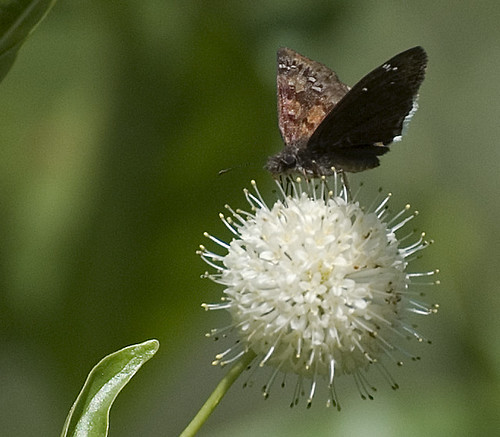
I cannot postively identify this butterfly or flower which I found along the Merced River just east of Mariposa, but it is still my picture of the day.
In the last workshop, we talked of photo opportunities in our backyard, one of which occurs when there is a “minus tide”. Essentially, a minus tide is a relatively rare, very low ocean water level condition that exposes a large amount of reef or ocean bottom. The coast here has a vast amount of shallow reef that, at a very low tide, traps many marine animals and exposes underwater plant life not normally seen while walking on the beach during regular tides.
I found this more technical explanation on the internet:
Jeff Renner
What’s a minus tide?
A minus tide, also sometimes called a negative tide, is an unusually low tide. Tide ‘heights’ are referenced to a base level set as zero. This level, called the ‘datum’, is the same level used to reference water depths on NOAA navigational charts.Usually, low tides still remain a bit above zero, often a foot or two above. But the swing from high tide to low tide levels is greatest when the sun and moon are either on exact opposite sides of the earth, or especially when they’re on the same side of the earth. This corresponds to a full or a ‘new’ moon. The gravitational ‘tug’ by both the sun and moon pull water toward them. As the earth rotates under the oceans, high tides occur when that part of the earth is facing either the moon or sun (or both). Low tides occur about six hours later, when the earth has turned ninety degrees away from either of those ‘bulges’ of water.
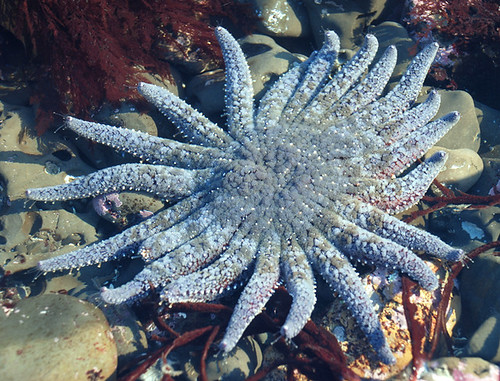
Sunflower Sea Star
This is indeed a photo opportunity to capture a wide variety of sea life provided the light is right and you are very careful with your equipment. Of course, you must consider the possibility of dropping your camera in the water. Even if the strap is securely around your neck, the rocks are slippery and if you fall in, your camera is going with you. These are things probably obvious to you but did not occur to me until I got out there for the first time.
But, if you are adventurous and except that risk, here are a few tips.
- Water proof boots help you get around easier and give you a bit more confidence.
- This is a good place to experiment with a polarizing filter which can reduce reflections on the surface of the water and provide better photographic access.
- Polarized sunglasses will also help your vision.
- Some kind of a reflector can be used to illuminate the critters hiding in the cracks or provide more direct light when the sun is low.
- I find a tripod to be a hindrance but you may want to try one if the lighting is poor.
When are these tides? Well, there are 2 low tides every 24 hours, but the times vary. You just need to know what time they happen and how low they will go. And you don’t necessarily need to wait for an absolute minus tide. Look for any tide near 0 and take a walk to the beach with your camera.
Click here to go to the daily tide chart adjusted for Half Moon Bay. The chart shows the tides 2 days at a time. Scroll down to find more search options and a link for the entire year. I see that that the minus tides for August and September will mostly be between 1am and 5am, when they do occur. October and November have some low tides on some late afternoons. The first week of December is looking good for some ‑1.50 foot tides.
Check out photos others have taken. Click here to go to Flickr pictures tagged with the words “fitzgerald and marine” which show many pictures from the Fitzgerald Marine Preserve in Moss Beach. The preserve is easily accessed and very popular during these low tides.
Click here to go to a tide pool group in Flickr.
The Half Moon Bay Review posted an article about the Fitzgerald Marine Preserve and how it recently gained enhanced protection status, a good thing with the state park closings looming over our heads. Click here to read it.
Well, that should keep you busy for a bit. Have fun and take some pictures!
Follow this link to the gallery of pictures we took at the Princeton Art Walk this past Saturday. This is a most unusual event put on by the artist community of Half Moon Bay and the Coastside. Watch for future happenings.
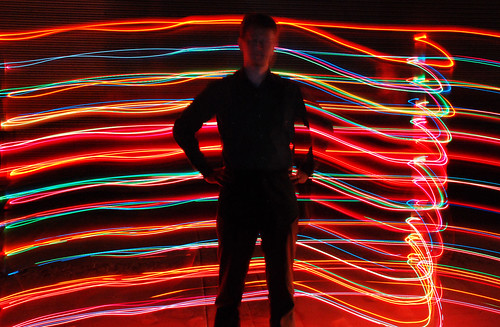
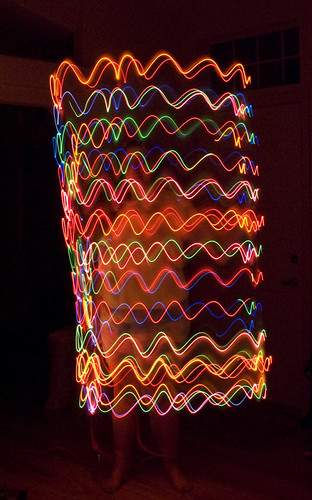
Lori and I will be performing Light Drawing at the Princeton Art Walk tomorrow. This is in Princeton Harbor, Half Moon Bay, CA, starting at 7pm. This is a free and organic event in which artist’s open their studios and homes to an evolving display of interactive art. Most activities will be up and down Harvard Street. Look for us after dark to be projecting near real time light drawings on the sides of buildings.
For more details, see this article in the Half Moon Bay Review and this PDF document for the schedule of events.
See you there!
This was taken 2 weeks ago and is my first attempt at the mature subject of the Golden Gate Bridge peeking out of the fog. Taken from the Marin Headlands, be prepared to sit around waiting for the right conditions. Bring a book or load the iPod with a collection of photography podcasts. And be prepared for the cold and wind. Also, the fog can move very fast and the picture can be gone in the time it takes you to get out of the car and focus your camera. I did a fair amount of level correction in Photoshop and a little red saturation to get the effect I was looking for. Checking the web cams (see the link in the right column) can help survey the conditions which may change drastically by the time you get there.

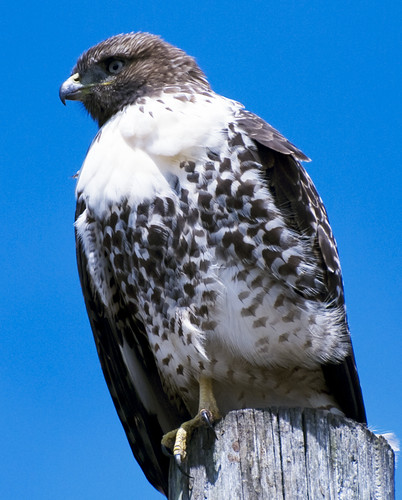
Is this a young redtail hawk? He was fairly big and his tail was not red. Anyway, that is my picture of the day.

Just driving down Highway 1 and noticed the irrigation and Johnson House in harmonic convergence. Click the picture for a larger view.

Our last photography workshop discussed the online photo hosting site, Flickr and here are the notes I prepared:
In addition to hosting pictures from photographers around the world, Flickr also functions as an online community and a social networking site and can be used to meet other photographers that share your interests. Keep in mind that Flickr’s primary function is to display your pictures and you can choose what others see or how much you interact with anyone else. In short, it is nothing like Facebook, no one is bugging you to be their friend and there are no ads when viewing your pictures, even for the free accounts. There is one ad on the free account when you go to your Flickr home page, but it is small.
According to Wikipedia, as of June, 2009, Flickr hosts 3.6 billion pictures. It was started by Ludicor in Canada in 2004 and bought by Yahoo in 2005. At that time, all content was moved to the United States and is now subject to US laws. It is currently the most popular photo hosting site.
There are both free and Pro accounts available. The free account limits your picture upload to 100 megabytes a month. The Pro account cost $25 for a year and allows you unlimited uploads. You can upload video, all accounts are limited to 90 seconds for each movie and pro accounts may upload High Definition video.
A note on the upload limit – if you have a free account, do not directly download pictures from your 10 megapixel camera into Flickr. Learn to use software to reduce your image files to a much smaller size while retaining picture quality. This will allow you to upload many more pictures taking full advantage of your free account. And select only your best pictures to upload. Leave the blurred and duplicate pictures out. You wouldn’t put those blurred pictures in your photo album.
A Yahoo ID is required to join. If you do not have a Yahoo ID, Flickr makes it easy for you to complete the form to get one.
Flickr is used by amateur and professional photographers as a quick and easy way to share their work with friends, family and clients. Bloggers use it as an easy place to store photos to use on their blogs and to allow others to use for web content or printing.
I find Flickr very easy to use and configure to my specifications. You control all privacy settings for photos, whether the general public can see them or just friends and family who are members. You can send guest passes to non members to see pictures you listed as private. You have some control over how your gallery appears to others. You can organize your photos into sets and collections. And there is plenty of assistance provided by Flickr to help you get the most out of your page.
Censorship (what you see) defaults to the strictest level, suitable for minors. You can adjust what you allow yourself to view from there.
There are few restrictions to what people can post. This is regulated only by the country from which you are viewing. Germany and China have very strict restrictions on what their citizens may view on Flickr.
Beyond publishing my photos, I find real value viewing the work of others. If you seek to improve your photography, looking at and analyzing other photos is an excellent way to learn. Some people follow their own course and prefer not to be influenced by other work. More power to them. I find other work very interesting, educational and inspiring and find Flickr is an excellent source for help and ideas.
Groups – Search out groups within Flickr, there are thousands of them, each with a specific theme in mind and thousands of people contribute to these groups everyday. If you need inspiration or want to learn a new technique, visit a group with a theme that interests you. You can view the photos by selecting from thumbnails or run a slideshow of the entire pool. Again, looking at and evaluating other’s work is a great way to further your abilities.
Some great groups to visit are “The Commons” and “Explore”. The Commons hosts photos with no known copyright restrictions and is filled with pictures from the Library of Congress, the Smithsonian Institute and many international libraries, museums and colleges. Explore hosts “most linked to” and “most viewed pictures” and represents an amazing collection of random work from around the world. I also enjoy a group called “Light Junkies”, a collection of light drawing and long exposure photography. Use the search engine at the top of the page to locate your interests.
The Commons is here: http://www.flickr.com/commons/
Explore is here: http://www.flickr.com/explore/
Light Junkies is here: http://www.flickr.com/groups/lightjunkies/
Here is one for the Golden Gate Bridge: http://www.flickr.com/groups/ggb/
Interact — You can comment or add overlay notes on any picture which the owner allows comments. You can join groups, add your photos, join in on discussions in each group’s forums and receive feedback on your pictures. Tag your photos with key words to help you sort through your photos and to help others discover you too. Commenting and receiving feedback can enhance everyone’s experience and provide valuable insight.
Protect Yourself – You knew it sounded too good to be true, but actually, it’s not so bad. There are a few things you should consider when you post pictures online. Posted pictures can be copied. Every digital picture contains data such as when the picture was taken and the camera settings. It can hold your name and contact information to protect your copyright privileges. You should make sure that your contact information is embedded in each photo you post. This gives you some form of copyright protection and gives others the ability to contact you if needed. The only way to completely be sure your work is never copied is to never post it. So, you need a level of trust to participate in the fun.
Obey the rules – Be aware that Flickr maintains the right to delete your account and all the pictures at any time for any reason. There have been a few complaints and disputes but there are usually facts missing from what I have read. These problems are rare. The rules are not unreasonable. Stay in the boundaries and keep copies of your pictures on your own computer.
Spend time setting up your Flickr profile. There are some copyright settings there too. That is where you determine who can see your pictures and if they can comment on them.
Flickr makes it easy to view various sizes of your picture, embed them into web pages and share them via email. It goes on and on and new features are instituted all the time. I use Flickr everyday, enjoy the interaction, learn from others and (until I find something grossly wrong) recommend it to everyone. Have Fun!
Reference: Derek Story produced a podcast (#175) on the Digitalstory website entitled “Top 10 Flickr tips”. Check it out.